Homemade Reese’s Cups with Vanilla Filling
Highlighted under: Soft Meals
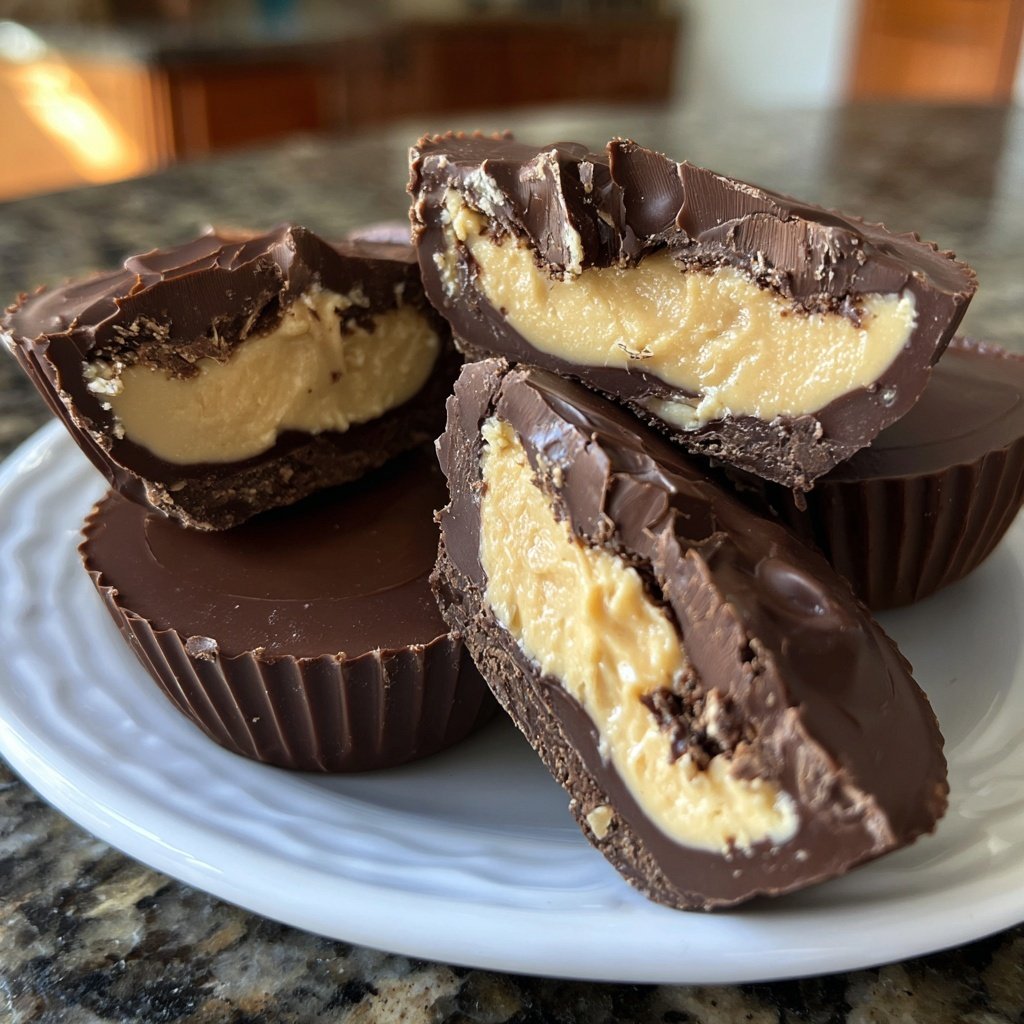
I’ve always been a fan of the sweet and creamy combination of chocolate and peanut butter, but I wanted to elevate that beloved classic. That’s when I decided to whip up a batch of Homemade Reese’s Cups with Vanilla Filling. The moment I took my first bite, I was instantly hooked. The smooth, rich chocolate shell enveloping a luscious vanilla center is a game changer. It’s the perfect treat to enjoy at any gathering or simply when I’m in need of a sweet indulgence.
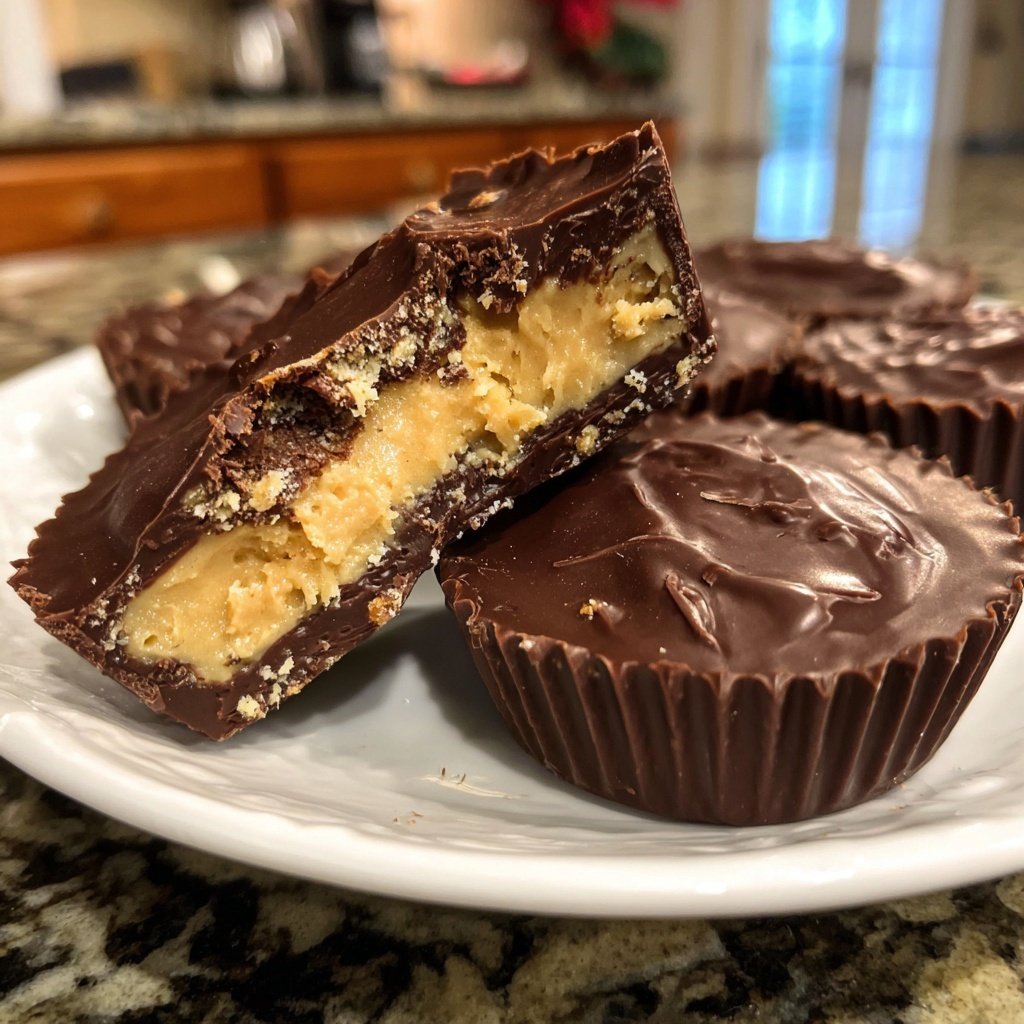
When I first attempted making these Homemade Reese’s Cups, I thought the process would be complicated. To my delight, I discovered that the secret lies in the simplicity of the ingredients. By using smooth peanut butter and quality chocolate, you can create a delicious dessert that rivals any store-bought version. The addition of the vanilla filling really lifted the flavor profile, adding an unexpected twist.
One tip I picked up along the way is to let your chocolate cool slightly before pouring it over the filling. This prevents the melted chocolate from disturbing the delicate vanilla layer, ensuring that each bite is both beautiful and delicious. Trust me; the end result is worth every bit of effort.
Why You’ll Love This Recipe
- Decadent chocolate paired with a creamy vanilla center
- Customizable fillings for a personal touch
- Perfect for gifting or enjoying with friends and family
The Chocolate Shell
Creating the chocolate cup is a pivotal step in this recipe. It’s essential to melt the chocolate mixture slowly and carefully to avoid burning the chocolate, which can occur if the microwave is set for too long. Stirring frequently will help achieve a silky-smooth texture, so aim for that glossy finish. If you notice any small lumps, microwave in additional 15-second bursts until fully melted.
Coating the muffin tin’s sides with chocolate is crucial. Not only does it create a sturdy shell, but it also ensures a satisfying bite each time. Don’t rush this step—use a spoon to gently rotate the liners, ensuring even coverage. If the chocolate sets too quickly, you can return it to the microwave for a few seconds to re-melt.
Perfecting the Vanilla Filling
The vanilla filling is where the magic happens. Mixing the peanut butter with powdered sugar not only sweetens the filling but also alters the texture, making it creamy yet firm enough to hold its shape. For an extra layer of flavor, consider using crunchy peanut butter—this adds a delightful texture contrast in the cups.
If you’re looking to adjust the sweetness, feel free to alter the powdered sugar amount slightly. Just remember, too much can make the filling overly sweet and inhibit that nice creamy consistency. A pinch of salt can also balance the flavors, enhancing the overall taste.
Serving and Storing
Once cooled and set, these homemade Reese’s Cups can be stored in an airtight container for up to a week—if they last that long! Keeping them refrigerated can help maintain their shape and texture, especially in warmer climates. If you prefer them chilled, an additional 10-15 minutes in the refrigerator can create a delightful experience as the chocolate firms up even more.
These cups are incredibly versatile for gifting! Consider packaging them in a decorative box or jar with a ribbon. You can even make a variation by adding different fillings, such as a salted caramel or a mix of crushed nuts, to surprise friends and family with something new every time.
Ingredients
For the Chocolate Cups
- 1 cup semi-sweet chocolate chips
- 1/2 cup milk chocolate chips
- 1 tablespoon coconut oil
For the Vanilla Filling
- 1/2 cup smooth peanut butter
- 1/4 cup powdered sugar
- 1 teaspoon vanilla extract
Feel free to adjust the sweetness of the filling by adding more or less powdered sugar based on your preference!
Instructions
Melt the Chocolate
In a microwave-safe bowl, combine the semi-sweet and milk chocolate chips with the coconut oil. Microwave in 30-second intervals, stirring between each, until melted and smooth.
Prepare the Cups
Line a muffin tin with paper liners. Using a spoon, add about 1 tablespoon of the melted chocolate into each liner, rotating the liners to coat the sides as well. Place in the freezer for about 5 minutes to set.
Make the Filling
In a mixing bowl, combine the peanut butter, powdered sugar, and vanilla extract until smooth. Remove the chocolate cups from the freezer.
Fill the Cups
Spoon about 1 tablespoon of the vanilla filling into each chocolate cup, smoothing it down gently.
Top with Chocolate
Pour the remaining melted chocolate over the filling in each cup, ensuring the filling is completely covered. Return to the freezer for another 10 minutes to fully set.
Enjoy
Once set, remove the cups from the muffin tin and enjoy your delicious, homemade Reese’s Cups!
These cups can also be stored in an airtight container in the refrigerator for up to one week.
Pro Tips
- Experiment with different nut butters or add a sprinkle of sea salt on top before freezing for added flavor.
Ingredient Substitutions
If you're looking for a dairy-free option, swap semi-sweet chocolate chips for a dairy-free chocolate variety. The same goes for the milk chocolate; there are excellent dairy-free counterparts widely available. Additionally, almond butter can replace peanut butter for a unique twist and allergy-friendly alternative.
For those watching their sugar intake, consider using a sugar substitute in place of powdered sugar. However, be sure to check the packaging for a conversion chart as some substitutes can be sweeter than traditional sugar, impacting the overall flavor balance of the filling.
Troubleshooting Tips
If you find the chocolate is not setting properly, it may have been overheated while melting. In this case, let it cool slightly before trying to coat the liners again. If the chocolate is too thick after cooling, simply return it to the microwave in short bursts, stirring until smooth before using.
Should your filling turn out too runny, adding a bit more powdered sugar can help thicken it. Alternatively, refrigerating the filling for a short time can increase its firmness, making it easier to spoon into the chocolate cups.
Questions About Recipes
→ Can I use dark chocolate instead?
Absolutely! Dark chocolate will give a richer flavor and work perfectly with the sweet vanilla filling.
→ How long do these last?
If stored in an airtight container, they can last up to a week in the refrigerator.
→ Can I make these vegan?
Yes! Substitute the chocolate with a dairy-free version and use a vegan nut butter for the filling.
→ Is there a way to make them sugar-free?
You can use sugar-free chocolate and a suitable sugar substitute for the filling.
Homemade Reese’s Cups with Vanilla Filling
Created by: Opal Kensington
Recipe Type: Soft Meals
Skill Level: Intermediate
Final Quantity: 12 cups
What You'll Need
For the Chocolate Cups
- 1 cup semi-sweet chocolate chips
- 1/2 cup milk chocolate chips
- 1 tablespoon coconut oil
For the Vanilla Filling
- 1/2 cup smooth peanut butter
- 1/4 cup powdered sugar
- 1 teaspoon vanilla extract
How-To Steps
In a microwave-safe bowl, combine the semi-sweet and milk chocolate chips with the coconut oil. Microwave in 30-second intervals, stirring between each, until melted and smooth.
Line a muffin tin with paper liners. Using a spoon, add about 1 tablespoon of the melted chocolate into each liner, rotating the liners to coat the sides as well. Place in the freezer for about 5 minutes to set.
In a mixing bowl, combine the peanut butter, powdered sugar, and vanilla extract until smooth. Remove the chocolate cups from the freezer.
Spoon about 1 tablespoon of the vanilla filling into each chocolate cup, smoothing it down gently.
Pour the remaining melted chocolate over the filling in each cup, ensuring the filling is completely covered. Return to the freezer for another 10 minutes to fully set.
Once set, remove the cups from the muffin tin and enjoy your delicious, homemade Reese’s Cups!
Extra Tips
- Experiment with different nut butters or add a sprinkle of sea salt on top before freezing for added flavor.
Nutritional Breakdown (Per Serving)
- Calories: 180 kcal
- Total Fat: 12g
- Saturated Fat: 3g
- Cholesterol: 0mg
- Sodium: 75mg
- Total Carbohydrates: 15g
- Dietary Fiber: 1g
- Sugars: 8g
- Protein: 4g